Double Din Radio Fit, Install and Buyer’s Guide
Buy a double din radio only after confirming the dash opening is about 7×4 inches, or that a vehicle-specific kit converts it cleanly, then match the wiring, antenna, steering-wheel-control, and backup-camera retention parts. Skip those checks and you can end up with trim gaps, lost factory features, extra adapter costs, or a unit that simply will not mount. This guide explains how to verify dash size, identify the install parts, compare feature tradeoffs, and choose a head unit that fits your car and your plan.
The 2-DIN standard covers the radio chassis opening, not the entire surrounding dash shape. A clean install also depends on bezel contour, usable dash depth, rear connector clearance, vent position, climate-control panels, and whether the vehicle uses a factory amp, data network, or integrated warning chimes. The DIN/ISO radio opening convention covers the standardized slot size, while vehicle-specific fitment still depends on the dashboard and brackets around it. ISO 7736; Metra application guides; Scosche fit guides
The smart buying order is simple: verify fit first, confirm install parts second, and compare features last. Screen size, wireless phone mirroring, DSP, and camera inputs matter, but only after the unit can mount without blocking controls or dropping factory functions you want to keep.
Start with fit, not features
What the 2-DIN standard covers and what it does not
A double din radio is built around the common 2-DIN opening size, often described as about 7×4 inches at the dash opening. That tells you the nominal face area for a standard chassis. It does not guarantee that the dash trim, side brackets, rear depth, or surrounding controls will accept every unit sold as double din. ISO 7736
That gap shows up most often with larger-screen models. A standard 6.8- to 7-inch in-dash unit usually stays within the dash plane, while a larger 9-inch or 10.1-inch display may sit proud of the dash on a floating mount. Manufacturers such as Sony, Alpine, Pioneer, and JVC publish exact screen and chassis dimensions for these formats, and those dimensions are what determine vent and control clearance, not the phrase “double din” by itself. Sony Mobile ES receiver specs; Alpine Halo series specs; Pioneer DMH floating-display specs; JVC digital media receiver specs
Why bezel shape and dash depth matter as much as opening size
Many failed installs start with a buyer checking only height and width. The better check has three parts: opening shape, usable depth behind the opening, and side or top clearance for the face or floating display. Curved factory bezels, recessed pockets, and thick trim rings can all change the result.
Dash depth is easy to miss because the radio may physically enter the opening but still hit HVAC ducts, support bars, factory harness bundles, or large rear connectors. Add a USB pigtail, camera lead, and antenna adapter, and a dash that looked fine on paper can become too tight. Metra, PAC, and iDatalink installation documentation routinely notes depth limits and rear-clearance issues by vehicle. Metra installation instructions; PAC vehicle integration guides; iDatalink Maestro fit notes
The cost of getting fit wrong before you buy
A wrong-first purchase usually costs more than the radio return. It can mean a second dash kit, a different wiring adapter, extra data modules, or a professional install bill to sort out retained accessory power, factory amp turn-on, or warning-chime retention.
Say your SUV has a factory premium audio package and a deep-looking center stack. The radio opening may accept a double din chassis, but the premium system may still require amp-integration parts and a steering wheel control interface. Skip those checks, and the unit powers up with no sound or loses key vehicle functions. That is a known issue in amplified and data-networked vehicles, and interface makers document it model by model. Axxess amplified-system integration notes; PAC amp-retention guides; iDatalink Maestro RR/RR2 compatibility pages
Size and Fitment Basics
The core difference between single and double DIN units lies in physical dimensions: single DIN is approximately 2 inches tall, while double DIN measures around 4 inches. This dimension dictates your dash compatibility, available screen real estate, and whether you need an adapter kit to preserve HVAC access.
Double vs single DIN guides cover these measurement standards, depth requirements, and feature trade-offs so you can verify your vehicle’s dash opening before purchasing hardware that might not physically fit your dashboard layout.
Will a double din radio fit my car?
Short answer: A double din radio fits only if the vehicle’s year, make, model, and trim match a compatible opening, dash depth, bezel shape, and electronics path. Check the factory radio layout first, then confirm whether the dash takes a true 2-DIN chassis or needs a kit, side brackets, or a floating-screen workaround.
Check year, make, model, trim, and factory radio layout
Start with your exact vehicle configuration, including trim level and factory audio package. Mid-cycle trim changes can alter the answer. Factory navigation, premium amplified audio, climate-control integration, or a screen tied into vehicle settings often changes the install from simple to complex.
If the vehicle came with a shallow factory touchscreen and separate lower climate panel, an aftermarket chassis may fit. If the factory screen also controls vehicle menus, parking settings, or seat functions, replacement may need a retention module, or may not be the clean choice at all. Vehicle-integration companies explicitly separate simple radio replacement from systems that also carry vehicle settings through the factory display. iDatalink Maestro product support; PAC RadioPRO guides
Measure opening type, usable depth, and side clearance
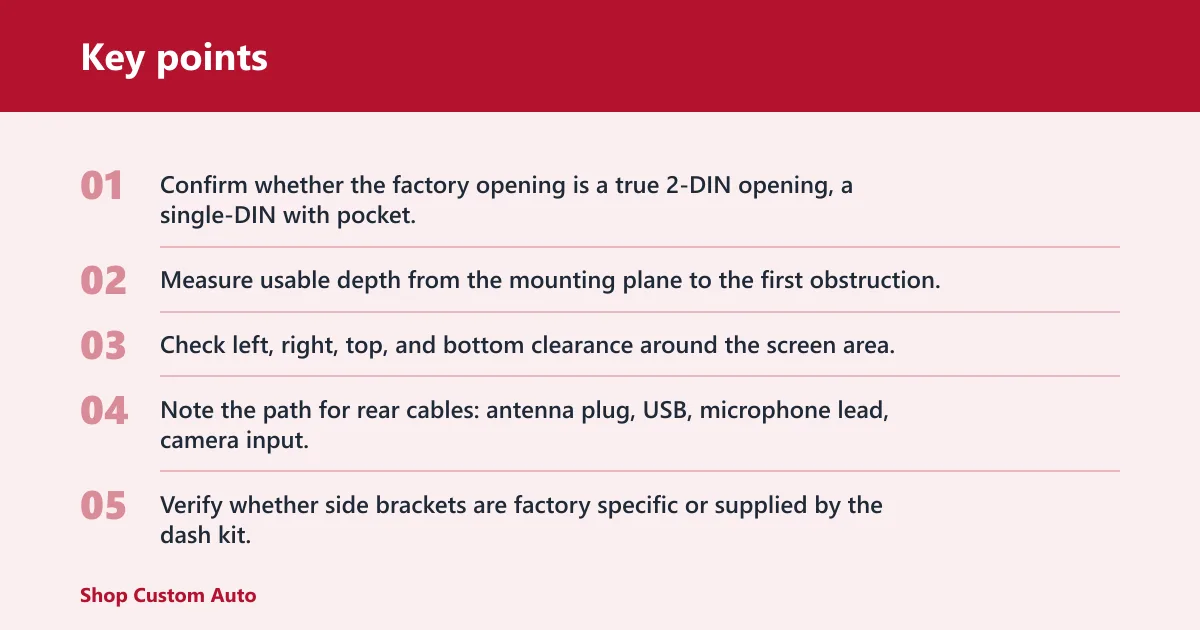
- Confirm whether the factory opening is a true 2-DIN opening, a single-DIN with pocket, or a custom molded opening that needs a kit.
- Measure usable depth from the mounting plane to the first obstruction, not just to the back wall of the cavity.
- Check left, right, top, and bottom clearance around the screen area, especially if you are considering a larger floating display.
- Note the path for rear cables: antenna plug, USB, microphone lead, camera input, and any external module wiring adapter.
- Verify whether side brackets are factory specific or supplied by the dash kit.
Picture a sedan with a recessed radio pocket and close upper vents. A standard in-dash 7-inch unit may clear the vent edges, while a larger 10.1-inch screen overhangs the vent louvers and blocks airflow adjustment. Same vehicle, same opening, different outcome from one variable: screen format.
Watch for climate controls, vents, shifter interference, and floating-screen overhang
Oversized displays often solve one problem and create another. A compact chassis can help in a shallow dash, but the larger screen may block hazard switches, touch-sensitive climate bars, or upper vents. In trucks and SUVs, a low-mounted screen can also crowd the shifter path in Park or First.
This is where mock-up dimensions matter more than the marketing photo. Compare the display edge, not just the chassis size, against nearby controls that you need while driving. Several floating-screen receivers include adjustable height, tilt, and fore-aft positioning for exactly this reason. Sony floating-display manuals; Pioneer floating-display manuals; Alpine Halo adjustment docs
When factory navigation or premium audio changes the answer
Factory nav and premium audio systems often add hidden parts to the job. The radio may fit physically but still need a data interface for retained accessory power, steering wheel controls, chimes, or amplifier turn-on. Some systems also route audio through a factory amp that expects a specific signal path.
If your vehicle has a branded premium system or a factory screen tied into vehicle settings, treat fit as both mechanical and electronic. That step catches many installs that look easy until final hookup. Interface makers and dash-kit makers both warn that “fits dash” does not mean “retains all factory features.” PAC RadioPRO documentation; iDatalink Maestro retention notes; Metra TurboKit instructions
Do you need a dash kit and other install parts?
Short answer: A dash kit is required whenever the factory opening, trim contour, or side mounts do not directly match the new radio. In many vehicles, that is still only part of the job. Clean installation also often needs a wiring harness, antenna adapter, steering wheel control interface, and sometimes a data module.
When a dash kit is required for a clean fit
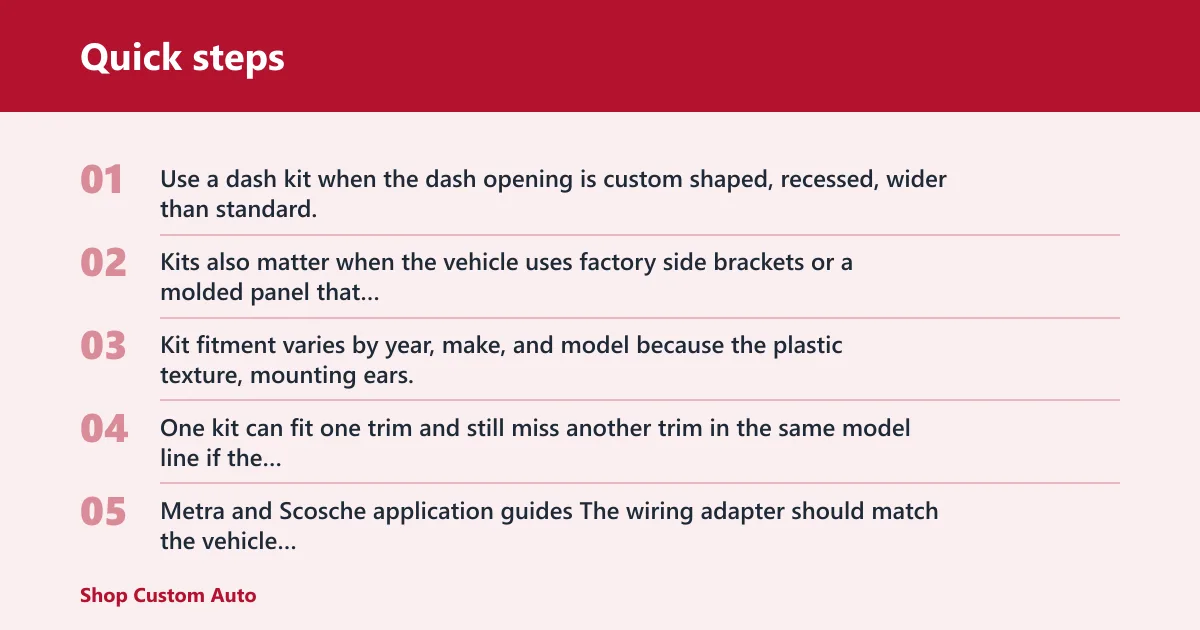
Use a dash kit when the dash opening is custom shaped, recessed, wider than standard, or built around a factory trim ring. Kits also matter when the vehicle uses factory side brackets or a molded panel that would leave visible gaps around a standard radio face.
Kit fitment varies by year, make, and model because the plastic texture, mounting ears, pocket location, and trim geometry vary by dashboard. One kit can fit one trim and still miss another trim in the same model line if the factory screen or climate panel changed. Metra and Scosche application guides
How to identify the right wiring harness and antenna adapter
The wiring adapter should match the vehicle connector, not the radio brand. That adapter lets you connect power, ground, speaker leads, illumination, and accessory functions without cutting the factory plug. The antenna adapter matters because many vehicles do not use the same plug style as the aftermarket head unit. Metra wiring guides; PAC harness guides
A common first-timer mistake is buying only the radio and dash kit. The unit arrives, the chassis fits, and then the factory antenna lead and vehicle adapter do not plug in. That turns a simple bench-prep job into a mid-install parts chase.
When steering wheel control interfaces and data modules are needed
Steering wheel control retention usually needs an interface module when the vehicle sends button commands through resistance values or a data bus. Data modules are also common for retained accessory power, warning chimes, reverse signal, parking brake output, and door-trigger information. Axxess ASWC documentation; PAC steering wheel control interfaces; iDatalink Maestro RR/RR2 feature lists
CAN-bus vehicles deserve extra attention here. If the factory radio handled vehicle communication tasks, removing it can affect no-key power behavior, chimes, amp wake-up, or camera switching unless the right retention hardware is added. CAN itself is an in-vehicle network standard; retention depends on the vehicle and interface, not on the radio alone. Bosch CAN specification overview; PAC RadioPRO guides; iDatalink Maestro integration notes
Factory amp, warning-chime, and retained accessory power retention
Factory amplified systems can need amp-integration adapters, line-level interfaces, or load-correct modules. Without them, symptoms can include very low volume, distorted output, or no sound at all. Warning chimes and retained accessory power are separate issues, and a basic harness often will not keep them working. PAC amp-retention documentation; Axxess AXDIS/AXDSP integration notes; iDatalink Maestro compatibility pages
Before checkout, list every factory function you want to keep: steering wheel controls, factory amp, reverse camera, USB port, microphone, warning chimes, and key-off delayed radio power. That list determines the parts stack more accurately than the radio’s feature sheet.
Which screen size should you buy?
Short answer: The best screen size is the one that fits the dash cleanly and keeps controls usable. A standard 7-inch double din unit is often the safest fit. Larger 9-inch or 10.1-inch displays add map visibility and touch area, but they raise vent, trim, and button-clearance risks.
Standard 7-inch units versus larger 9-inch and 10.1-inch displays
Most standard double din buyers land on a 7-inch screen because it fits within the expected dash footprint. That format is practical for dashes with tight bezel openings or nearby controls.
Larger displays change the value equation. Nine-inch and 10.1-inch floating or halo-style screens are easier to read for navigation, but they ask more from the surrounding dashboard. The exact usable area and overhang differ by brand, so compare published dimensions rather than assuming all 10.1-inch units sit the same way. Sony, Alpine, Pioneer, and JVC published receiver dimensions
Compact chassis with large screens: where they help and where they create issues
A compact chassis paired with a larger screen can help when the dash cavity is shallow or oddly shaped. The radio body tucks farther back, and the screen sits forward. That can rescue fit in some older vehicles and some trucks.
It can also create new conflicts. The forward screen may cover hard buttons, brush the shifter arc, or hide part of the climate display. Always judge the front overhang and lower edge height, not just the smaller rear chassis.
Touch targets, glare, and physical-button access in daily driving
Larger screens can make icons easier to hit, but they also rely more on touch input. If you drive with gloves, direct sun, or frequent HVAC adjustments, physical volume and track buttons still matter. A slightly smaller screen with better button placement can be easier to live with every day.
How do you choose between a compact and a larger double din display? Start at the dash, not the product page. If the dash has open space above and to the sides, a larger screen can work well. If the radio sits close to vents or climate keys, compact usually holds up better.
Which features are worth paying for?
Short answer: Pay for features that match how the car is used after fit is settled. Wireless phone integration helps daily commuters, detachable-face designs still matter in some parking situations, and backup camera support is close to essential for many buyers. Skip expensive extras that do not change daily convenience or retention.
Wireless CarPlay and Android Auto: convenience versus charging and connection tradeoffs
Wireless smartphone integration is worth checking before purchase because it changes daily use more than many display upgrades. Wireless CarPlay and wireless Android Auto reduce cable clutter and work best when the radio supports stable Bluetooth pairing, Wi-Fi data transport, and a clear microphone path for voice commands. Apple CarPlay user guide; Android Auto Help
There are tradeoffs. Wireless startup can be slower than plugging in directly, and some receivers first pair over Bluetooth before handing off data over Wi-Fi. Some drivers prefer wired connections for charging consistency and fewer connection variables. Android Auto and CarPlay availability also depends on the phone, OS version, region, and the head unit’s own implementation. Apple CarPlay requirements; Android Auto compatibility requirements
Wireless CarPlay is easiest to justify when you make frequent short trips and want quick access to maps and calls without handling a cable. Wired can be smarter if the vehicle already has a good phone mount and charging is the higher priority. If you depend on long navigation sessions, remember that wireless phone mirroring still consumes battery unless the vehicle also provides dependable charging.
Detachable face: when theft deterrence still matters
Detachable-face designs are less common than they once were, but they still matter in vehicles parked on the street, older cars without covered storage, or builds where a flashy screen draws attention. A removable panel can reduce temptation, but it does not prevent theft.
In this category, the real comparison points are simple: whether the face is actually removable, whether it stores securely, and whether the unit gives up other features to provide that design. Use published manufacturer specs here rather than assuming every detachable-face unit offers the same screen size or tuning controls.
Backup camera support, extra camera inputs, and call quality basics
Backup camera support should be treated as a must-have by many shoppers, even if no camera is installed on day one. Support means the head unit accepts a camera input and can switch to it when the reverse trigger wire sees the proper signal. It does not mean a camera is included. Receiver owner’s manuals from Sony, Pioneer, Alpine, and JVC
Extra camera inputs matter for larger vehicles, but a single reliable rear-camera input covers most needs. For call quality, microphone placement matters as much as the radio feature list. Mount the mic high and clear of vents, then route the lead away from noise sources if possible.
What audio features actually matter?
Short answer: Audio features that matter most are the ones that let the radio work with the rest of the system: preamp outputs, subwoofer control, crossover settings, time alignment, DSP, and a usable equalizer. Marketing labels matter less than whether the unit can tune speakers, amps, and source levels properly.
Equalizer bands, crossover controls, and time alignment
An equalizer gives you direct control over bass, mids, and treble, but the number of bands affects how precisely you can tune problem areas. Many current receivers publish 13-band EQ, crossovers, and listening-position adjustment in their manuals; those are the kinds of verifiable specs worth comparing.
Crossover controls matter if you run door speakers with a subwoofer or external amps. Time alignment helps center the soundstage by offsetting speaker timing so the driver’s seat does not hear every speaker arrival at a different moment. Pioneer, Alpine, Kenwood, JVC, and Sony receiver manuals
DSP for staging, tonal balance, and system tuning
DSP is useful when the goal is more than basic bass and treble adjustment. It can improve tonal balance, blend speaker handoff points, and make a system sound more coherent across seats. For audio-first buyers, DSP is usually worth more than a slightly bigger display.
If the car will keep factory speakers for now but may add amps later, built-in DSP and flexible crossover settings provide room to grow without replacing the head unit again.
Preamp outputs, subwoofer control, and external amplifier readiness
Preamp outputs matter when external amplifiers are part of the plan. Subwoofer level control from the dash makes daily adjustment easier, and multiple preouts reduce the need for workaround adapters. Dual subwoofer outputs, front/rear/sub preouts, and configurable high-pass and low-pass filters are all objective specs you can confirm in the owner’s manual.
Built-in “watts per channel” claims matter less as a buying shortcut than as a reminder to separate onboard amplifier output from total system design. If serious output is the goal, choose the unit for tuning and connectivity first, then add external amplification where needed. CEA-2006 amplifier-rating background; receiver manufacturer manuals
Compatibility checklist table
Pre-purchase fit checks
Use this table before comparing models. Fill it in with your vehicle’s exact details, then shop only among units and parts that match the answers. The goal is to catch physical and electronic conflicts before you buy a radio that looks right but installs badly.
| Vehicle year/make/model | Factory opening type | Dash depth | Kit needed | Wiring harness needed | Antenna adapter needed | Steering wheel control interface needed | Known install risks | Example fit outcome | Red-flag notes | Stop-buying if… |
|---|---|---|---|---|---|---|---|---|---|---|
| 2012 Honda Civic LX | Custom molded opening with integrated trim | Moderate; check rear connector bend room | Yes, vehicle-specific double din kit | Yes | Often yes | If equipped with steering wheel buttons | Bezel contour mismatch, climate-panel proximity, factory USB retention limits | Usually a clean 7-inch in-dash install with the correct kit; larger floating screens need extra vent and climate-clearance checking | If the car has factory USB you want to keep, confirm a separate retention path before purchase | Stop if the kit leaves unresolved trim gaps or if the factory feature list includes retained functions your parts stack does not cover |
| 2015 Ford F-150 XLT | Factory 2-DIN style with trim panel variation by trim | Moderate to shallow depending on module space | Usually yes for clean trim fit | Yes | Often yes | Usually yes | CAN-bus retention, warning chimes, retained accessory power, factory camera retention | Standard 7-inch units are often lower-risk; floating displays can work but need shifter and vent mock-up checks | If factory screen functions, camera retention, or accessory-power behavior are not clearly documented, treat the install as incomplete | Stop if no compatible data interface is listed for your exact trim/audio package |
| 2006 Chevrolet Silverado 1500 WT | Single-DIN plus pocket or custom opening depending on radio | Good depth, but rear harness bulk matters | Yes, conversion kit if upgrading to double din | Yes | Often yes | If wheel controls are present | Pocket conversion trim, metal support trimming on some setups, chime retention | Often a workable double din conversion, but only if the chosen kit and bracket set match the dash version | Metal support trimming and chime retention are the two checks most likely to change the install from easy to involved | Stop if you are not willing to trim support material on setups that require it, or if warning-chime retention is mandatory and unsupported |
| 2018 Toyota RAV4 XLE | Integrated factory screen opening | Moderate; verify vent and bezel clearance | Yes | Yes | Often yes | Usually yes | Factory camera retention, microphone retention limits, premium-audio amp integration if equipped | Usually a straightforward standard-screen install with the right parts; premium audio adds integration steps | Do not assume factory mic and camera both retain through the same adapter path | Stop if premium-audio integration is not explicitly supported for your trim or if camera retention requires parts you cannot source |
| 1998 BMW 328i | Nonstandard opening in many trims | Shallow to moderate; check ducting | Often custom or vehicle-specific kit | Yes | Often yes | Only if controls are fitted | Shallow depth, trim modification risk, old harness condition, antenna fit differences | Possible, but often best with a shallow or compact-chassis solution and realistic expectations about trim work | Older plastics, brittle clips, and unknown prior wiring repairs are major red flags | Stop if the car already has hacked wiring, damaged dash plastics, or no credible kit path for a clean face finish |
Common install problems to catch before checkout
Shallow dash depth and blocked rear connectors
Rear connector space is often tighter than the raw cavity measurement suggests. RCA plugs, antenna adapters, USB leads, and camera inputs need bend radius. A radio that barely fits can press on connectors, creating intermittent faults or preventing the unit from seating fully.
CAN-bus conflicts, no-key power behavior, and warning chimes
Vehicles that use a data network for radio-related functions can lose delayed shutoff, key sense, warning chimes, or wheel-button operation without the right interface. These are common failure points, and they are easy to miss because the radio may still power on during a quick bench test. Retention of these functions is typically documented by PAC, Axxess, and iDatalink by exact vehicle application. PAC RadioPRO; Axxess vehicle applications; iDatalink Maestro
Factory camera, USB, and microphone retention limits
Retention is not always all-or-nothing. A kit may keep the factory USB port but not the factory microphone. A camera may display only with a separate retention adapter. Read each retained feature line by line rather than assuming every factory plug can be reused.
When professional installation is the safer choice
Professional installation makes sense when the vehicle has a factory amp, integrated vehicle settings, multiple data modules, or a floating display that sits close to vents and controls. The labor cost can be lower than the price of trial-and-error parts, broken trim clips, and repeat disassembly.
Best choice by use case
Daily commuter who wants fast smartphone access
Prioritize reliable phone integration, a readable screen, and a strong microphone path. Wireless CarPlay or Android Auto is worth paying for if cable-free entry matters and the commute is short enough that charging is not a daily concern. Keep screen size modest if the dash is busy.
Classic-car owner working around nonstandard openings
Fit rules the whole decision. Older vehicles often need custom trim, shallow-depth solutions, or a compact chassis with a larger screen. Detachable-face models deserve a harder look here because parking exposure can be higher and covered storage is often limited.
Audio-first buyer building around amps and DSP
Choose the radio for tuning control before cosmetics. Look for DSP, time alignment, multi-band EQ, proper crossover control, and the preamp layout needed for front, rear, and sub channels. Those objective tuning specs matter more than an extra inch of screen.
Driver focused on factory-feature retention and clean OEM-style fit
Start with the vehicle’s retained-function list, then pick the radio last. Factory camera, steering wheel controls, warning chimes, accessory power behavior, and amplifier retention should all be confirmed in advance. A standard in-dash 7-inch format is often the least risky path for an OEM-like result.
Frequently asked questions
Do I need a dash kit for a double din radio?
Short answer: Many vehicles do. A dash kit is needed when the factory opening is custom shaped, recessed, wider than standard, or built around special side brackets and trim. Even then, the kit is usually only one part of the job, and the harness, antenna adapter, and wheel-control interface may still be separate.
What screen size is best for a double din stereo?
Short answer: A 7-inch unit is usually the safest fit and the easiest path to a clean install. Larger 9-inch and 10.1-inch displays improve map readability and touch area, but they can block vents, physical buttons, or shifter travel. Choose by dash clearance first, then by display preference.
Should I buy wireless CarPlay or Android Auto in a double din radio?
Short answer: Buy wireless if cable-free convenience matters more than guaranteed charging and the shortest possible startup path. Daily commuters often like it. Buyers who value battery charging, simple troubleshooting, and fewer connection variables may still prefer wired operation, especially for longer drives or older phones.
Wireless CarPlay and wireless Android Auto typically pair the phone over Bluetooth first and then use Wi-Fi for the main data connection, which is why startup behavior, reconnect speed, and battery drain can differ from wired use. Apple and Google both note that feature availability depends on compatible phones, software versions, and supported vehicles or receivers. In practice, wired remains the safer choice for long navigation sessions, weak in-car charging setups, or users who want the most predictable connection every time they start the car. Apple CarPlay user guide and requirements; Android Auto Help and compatibility pages
What audio features matter most in a double din car stereo?
Short answer: Look past generic sound claims and focus on the tuning tools: multi-band EQ, DSP, crossover control, time alignment, preamp outputs, and subwoofer level control. Those features determine whether the radio can work cleanly with factory speakers today and with amps or subs later.
Do I need backup camera support in a double din head unit?
Short answer: For many buyers, yes. Even if a camera is not installed immediately, a head unit with rear-camera input keeps the upgrade path open. Confirm trigger-wire compatibility and any factory-camera retention parts in advance, because camera support on the radio does not mean the vehicle-side connection is automatic.
Can I keep my factory amplifier with an aftermarket double din radio?
Short answer: Often yes, but not with every vehicle and not with a basic harness alone. Factory amplified systems frequently need a dedicated integration harness, line-level interface, or data module so the amp turns on correctly and receives the right signal level. If your vehicle has JBL, Bose, Fender, Infinity, Rockford Fosgate, or another branded factory system, verify amp retention by exact trim before buying. PAC amplified-system guides; Axxess integration docs; iDatalink Maestro compatibility pages
How do I verify CAN-bus and steering wheel control retention before I buy?
Short answer: Check the vehicle in a reputable integration database before comparing radios. Look up your exact year, make, model, trim, and audio package in the application guides from PAC, Axxess, Metra, or iDatalink. If those guides do not list retained accessory power, chimes, wheel controls, camera, and amplifier support for your vehicle, treat the install as unresolved and do not buy on assumption alone.
Sources
- ISO 7736 — Road vehicles standard for radio aperture dimensions and installation space.
- Apple CarPlay User Guide and Apple CarPlay availability/requirements documentation — for wired and wireless CarPlay behavior and compatibility requirements.
- Android Auto Help and Android Auto compatibility documentation — for wired and wireless Android Auto behavior and phone requirements.
- iDatalink Maestro RR/RR2 compatibility and installation documentation — for retained factory features, CAN-bus/data integration, steering wheel controls, and amplifier retention notes.
- PAC Audio RadioPRO and steering wheel control documentation — for retained accessory power, warning chimes, camera retention, and factory amp integration details.
- Axxess/Metra vehicle application and integration guides — for dash kits, harnesses, steering wheel control interfaces, and amplified-system integration.
- Scosche fit guides — for vehicle-specific dash kit and trim-fit reference.
- Sony, Alpine, Pioneer, JVC, and Kenwood receiver owner’s manuals and spec pages — for published screen sizes, chassis dimensions, EQ/DSP features, camera inputs, and smartphone-integration support.
- Bosch CAN overview materials — for background on controller area network behavior in vehicles.