Subwoofer Box Guide: Size, Design and Fitment
Start with the largest box your vehicle can truly fit, then size that enclosure to the subwoofer maker’s required net internal volume, mounting depth, and sealed or ported design, based on the bass result you want. Miss that target and you can give up output, risk sub damage, lose cargo or seat travel, and spend money on a box that never fits correctly. This guide covers how to measure space, pick enclosure size and type, and verify dimensions for trunks, hatches, SUVs, behind-seat areas, and under-seat installs.
That fitment-first order matters because the vehicle sets the box you can use before speaker diameter does. A 12-inch driver may need more air space than the trunk opening or seat clearance allows, while a shallow-mount model in a compact sealed enclosure may fit cleanly and still hit the goal. If you are comparing alignments, see our sealed vs ported subwoofer boxes guide, plus related fitment pages on subwoofer sizes and shallow-mount subwoofers.
Start with fitment, not the box
Measure the space that actually remains usable
Start with the vehicle, not an enclosure catalog. Measure trunk or cargo-floor width, maximum depth, maximum height, and the smaller opening dimensions the box must pass through during installation.
Then check the limits many people miss: seat-back angle, hinge intrusion, spare-tire hump, amp rack clearance, grille clearance, and how much cargo room must remain once the box is installed.
A common first-timer mistake is measuring only the flat floor. The box clears the floor dimensions, then hits trunk hinges when the lid closes, or blocks rear seat fold-down that still needs to work.
Check opening size, moving parts, and daily use
A box that fits inside the trunk is useless if it will not pass through the trunk opening. Measure opening width, opening height, and any pinch points created by weatherstripping, latch trim, or hinge arms.
Also check seat travel in trucks and coupes, hatch close lines in SUVs, and service access to the battery, jack, or spare. If the enclosure covers tie-down points or access panels, account for that before you cut wood.
Map the shape limits
Rectangles are easy to calculate, but they are not the only workable shape. Wedge boxes fit under rear decks and behind truck seats. Low-profile designs fit under seats. Corner-fit enclosures can keep center cargo space open, though the shape takes more careful math.
Terminal placement matters too. A rear terminal cup may need extra clearance from the seat back or trunk wall. A side terminal can save depth if the wire path stays protected.
How do you determine subwoofer box size for your sub?
Determine box size by starting with the subwoofer maker’s recommended net internal volume, then checking whether your vehicle can physically hold that volume after wall thickness and all displacement losses are subtracted. Match mounting depth, magnet clearance, and enclosure type to the space you actually have, not the driver diameter alone.
Use the manufacturer’s enclosure volume as the controlling spec
The driver’s recommended sealed and ported volumes control the decision. Diameter alone does not. Two 12-inch subs can need very different boxes because their motor, suspension, and intended alignment differ.
For example-only context from manufacturer documents, not as universal ranges: JL Audio’s 12TW3 thin-line 12-inch subwoofer is specified for a compact sealed enclosure around 0.80 cu ft net, while a conventional 12-inch model such as KICKER’s CompR 12 is specified for a larger sealed enclosure around 1.0 cu ft net, and Alpine’s S-W12D4 lists a broader sealed recommendation centered on compact-to-moderate sealed volumes. The right target is always the exact sheet for your driver. If you are still deciding between diameters, compare the tradeoffs on our subwoofer sizes page.
Check depth, cutout, and magnet clearance
Net volume can look correct on paper while the driver still does not fit. Confirm mounting depth, basket diameter, cutout diameter, and any needed clearance between the magnet and rear wall.
Shallow-mount subwoofers are often the right answer when seat-back clearance or under-seat height is tight. JL Audio’s TW3 series, for example, is designed around reduced mounting depth and compact enclosure recommendations compared with many standard-depth drivers. They commonly work best in low-profile sealed enclosures where fitment takes priority over maximum output. For that style of install, our shallow-mount subwoofers guide helps narrow the options.
Choose net volume before exterior dimensions
Exterior dimensions come last. First pick the target net internal volume from the subwoofer specification, then work backward through wall thickness, driver displacement, bracing, terminal cup displacement, and port volume if the design is vented.
Suppose a driver calls for 1.25 cu ft sealed net and the vehicle only allows a low wedge behind the rear seat. If the math ends at 0.85 cu ft net after deductions, the box is wrong for that driver even if the outside dimensions look perfect.
Box volume worksheet
Text-only fitment worksheet
Use this worksheet to turn real vehicle space into realistic enclosure volume. The example below uses simple rectangular math so the sequence stays clear. The same logic applies to wedges and custom side boxes, but those need section-by-section measurements.
| Step | Input or formula | Example value | Result |
|---|---|---|---|
| 1. Maximum exterior space | Width × height × depth available in trunk | 32 in × 15 in × 16 in | 7,680 cu in gross exterior space |
| 2. Wall thickness | Use 3/4-inch MDF on all panels | Subtract 1.5 in from each exterior dimension pair | 30.5 in × 13.5 in × 14.5 in internal dimensions |
| 3. Gross internal volume | 30.5 × 13.5 × 14.5 | 5,969.625 cu in | 3.45 cu ft gross internal volume |
| 4. Driver displacement | Subtract manufacturer-listed displacement | 0.12 cu ft | 3.33 cu ft remaining |
| 5. Port displacement | Subtract vent volume if ported | 0.55 cu ft | 2.78 cu ft remaining |
| 6. Terminal cup displacement | Subtract small internal intrusion | 0.03 cu ft | 2.75 cu ft remaining |
| 7. Bracing displacement | Subtract brace material volume | 0.10 cu ft | 2.65 cu ft net internal volume |
| 8. Compare to target | Compare final net volume to the driver requirement | Driver needs 1.25 cu ft sealed or 2.50 cu ft ported net | Both fit on paper; ported needs tuning and port clearance check |
Worksheet use notes
- Measure the biggest exterior box the vehicle can take without hitting the opening, hinges, seat backs, or cargo limits.
- Subtract panel thickness from each dimension pair to find internal dimensions.
- Calculate gross internal volume in cubic inches, then divide by 1,728 to convert to cubic feet.
- Subtract the driver’s displacement, any port displacement, terminal cup displacement, and all bracing volume.
- Compare the final net number to the subwoofer maker’s sealed and ported recommendations.
- Only then decide whether sealed or ported still makes sense for your listening goal and fitment.
To make this more useful as a calculator-style planning sheet, copy the table below into Notes, Google Sheets, or Excel and fill in your own dimensions before you buy a box or start cutting. Use the maker’s published displacement numbers for the exact woofer and vent design you are considering. If you are building a vented enclosure, pair this worksheet with our sealed vs ported subwoofer boxes guide so you can compare required space before committing.
| Vehicle area | Opening width × height | Max installed width × height × depth | Panel thickness | Gross internal cu ft | Driver displacement | Port displacement | Terminal + bracing | Net cu ft | Driver target | Fit verdict |
|---|---|---|---|---|---|---|---|---|---|---|
| Trunk worksheet | _____ × _____ | _____ × _____ × _____ | _____ | _____ | _____ | _____ | _____ | _____ | _____ | _____ |
| SUV / hatch worksheet | _____ × _____ | _____ × _____ × _____ | _____ | _____ | _____ | _____ | _____ | _____ | _____ | _____ |
| Behind-seat truck worksheet | _____ × _____ | _____ × _____ × _____ | _____ | _____ | _____ | _____ | _____ | _____ | _____ | _____ |
| Example scenario | Vehicle area | Measured exterior limit | Internal math after 3/4-inch panels | Deductions | Final net result | Outcome |
|---|---|---|---|---|---|---|
| Compact sedan | Trunk | 34 in × 15 in × 16 in through a 33 in × 15 in opening | 32.5 in × 13.5 in × 14.5 in = 3.68 cu ft gross | 0.12 cu ft driver + 0.06 cu ft terminal/bracing | 3.50 cu ft sealed-capable gross space, or less once a vent is added | Enough room for many 12-inch sealed alignments; ported depends on the exact driver and vent size |
| Mid-size SUV | Hatch cargo side | 36 in × 17 in × 18 in while keeping third-row access clear | 34.5 in × 15.5 in × 16.5 in = 5.11 cu ft gross | 0.15 cu ft driver + 0.75 cu ft slot port + 0.12 cu ft bracing | 4.09 cu ft net | Realistic space for a larger vented 12 or a pair of compact sealed drivers, depending on the spec sheet |
| Crew-cab pickup | Behind rear seat wedge | 52 in wide, 15 in high, 7.5 in bottom depth, 4.0 in top depth | Approx. 50.5 in × 13.5 in × 4.75 in average depth = 1.87 cu ft gross before shape losses | 0.10 cu ft shallow driver + 0.10 cu ft bracing/terminal | About 1.67 cu ft net shared space | Usually a shallow sealed layout, not a deep ported build, unless seat position changes |
Those example outcomes are intentionally tied to available space first. They are not blanket recommendations for every 10-inch or 12-inch woofer. A compact thin-line driver may work well in the truck example, while a standard-depth ported 12 often will not. If your numbers are close, compare them against the exact shallow model on your shortlist and review our shallow-mount subwoofers page before locking in a design.
Practical Volume Calculation Steps
The guide at determine subwoofer box size breaks down the specific math required to move from rough estimates to precise construction plans. It covers calculating gross internal volume and subtracting displacements from the driver, port, and internal braces to find the true net volume. This process ensures your final enclosure stays within the manufacturer’s recommended range, preventing common errors that lead to weak bass or potential driver damage. Use this worksheet to verify your measurements before cutting any wood, ensuring the final build matches the acoustic requirements of your specific subwoofer model.
How do you calculate subwoofer box size?
Calculate subwoofer box size from internal dimensions, not external ones. Multiply internal width, height, and depth to get cubic inches, divide by 1,728 to get cubic feet, and then subtract displacement from the driver, port, terminal cup, and bracing to reach the net internal volume that the subwoofer actually sees.
Rectangular box formula
For a rectangular enclosure, use internal width × internal height × internal depth. If the result is in cubic inches, divide by 1,728 for cubic feet.
Example: 30.5 × 13.5 × 14.5 = 5,969.625 cubic inches. Divide by 1,728 and the gross internal volume is 3.45 cubic feet.
Gross volume versus net internal volume
Gross internal volume is the empty air space inside the panels. Net internal volume is what remains after subtracting everything inside the box that takes up air space.
That makes net volume the number that matters for enclosure matching, not gross external size and not gross internal volume. Driver displacement, port displacement, terminal cups, and bracing all reduce the final figure.
Wedges and irregular shapes
Wedge boxes need section math. One common method is to average the top and bottom depths, then multiply by width and height. More complex side boxes should be broken into smaller rectangles or trapezoids, then added together before subtracting displacement.
That extra work matters because a shallow taper can remove more usable air space than expected, especially in behind-seat truck enclosures where every inch counts.
Common calculation mistakes
- Using exterior dimensions as if they were internal dimensions
- Forgetting to subtract a double baffle from internal depth
- Ignoring port displacement in vented boxes
- Skipping brace volume in large panels
- Measuring the trunk floor but not the trunk opening
- Planning a driver depth that leaves no grille or magnet clearance
If you are adding a thicker front panel or window braces, account for that early. Our MDF thickness and baffle bracing guide covers the usual deductions builders forget when they move from a simple rectangular sketch to a real enclosure.
Which box design fits your goal and space?
Choose the enclosure type only after fitment math shows what net volume is available. Sealed boxes suit tight packaging and smooth response, ported boxes trade more space for more output around tuning, bandpass suits narrow-range SPL use, and infinite baffle only works when the vehicle can fully separate front and rear waves.
Sealed boxes
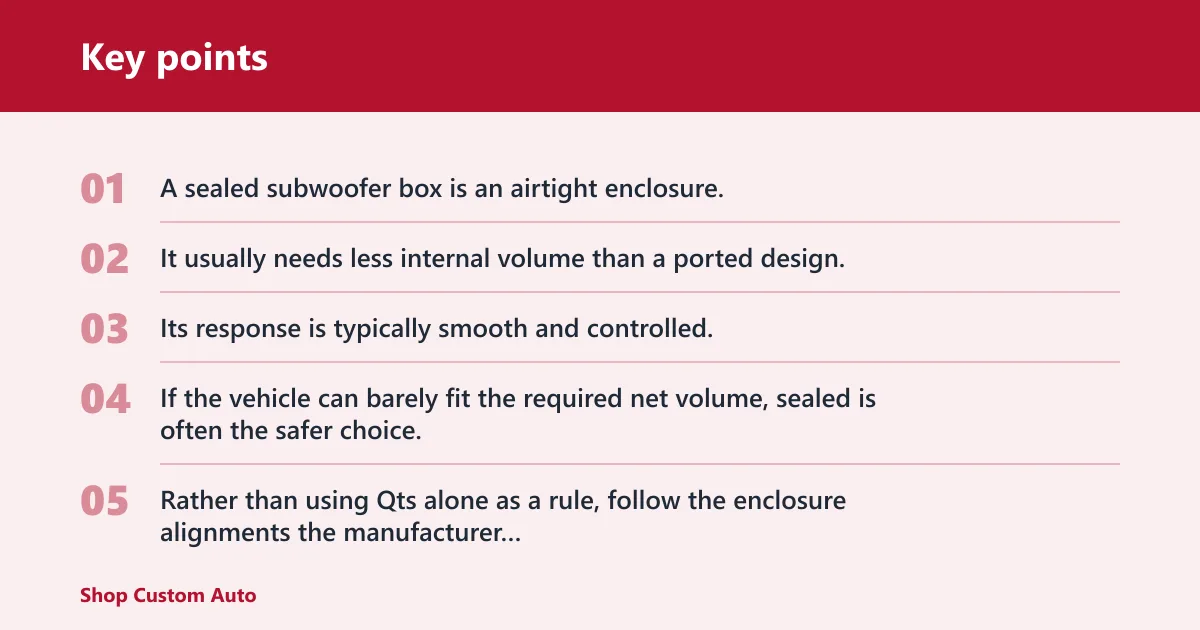
A sealed subwoofer box is an airtight enclosure. It usually needs less internal volume than a ported design, which makes sealed the most practical option in very tight space.
Its response is typically smooth and controlled, with good transient response and less sensitivity to small volume errors. If the vehicle can barely fit the required net volume, sealed is often the safer choice.
Rather than using Qts alone as a rule, follow the enclosure alignments the manufacturer publishes for the specific driver. In classic loudspeaker alignment references such as Vance Dickason’s Loudspeaker Design Cookbook and A.N. Thiele / Richard Small vented-box work, moderate-to-higher Qts drivers often lend themselves more easily to sealed alignments than very low-Qts drivers, but the actual recommendation still depends on the full parameter set and the maker’s tested box designs.
Ported boxes
A ported box uses a vent to reinforce output around a chosen tuning frequency. In car audio, boxes are usually tuned around 30–36 Hz.
Ported designs can produce more output than sealed, but the gain depends on the exact alignment, bandwidth, and vehicle. A 3 dB class improvement around the passband is a reasonable theory-level expectation for many vented alignments in loudspeaker design references, but it is not a guaranteed in-car result for every woofer or every box. The tradeoff is larger volume, a longer port, and more sensitivity to design errors.
Tuning frequency controls where output is emphasized. Lower tuning can improve low-bass weight, but it often needs more box volume, more port length, or both. That is why a deep-bass ported design often runs into depth limits before the sub itself does.
As with sealed designs, Qts is only a clue. Many lower-Qts drivers are excellent vented candidates, but the deciding numbers should come from the manufacturer’s ported recommendation and, when available, its published tuning frequency and minimum port area. For a side-by-side comparison of space needs and behavior, see sealed vs ported subwoofer boxes.
Bandpass boxes
Bandpass designs are specialty tools, not default choices. A 4th-order bandpass uses one sealed chamber and one ported chamber. A 6th-order bandpass uses two ported chambers.
These boxes can produce very strong output across a narrower frequency span, which is why they appear in SPL-focused builds. They are harder to design correctly, harder to package, and less forgiving when chamber volume or tuning is off.
Infinite baffle setups
Infinite baffle uses the vehicle’s trunk space or another large cavity as the effective enclosure. The front and rear waves must be sealed from each other, usually through a rear deck or baffle wall, or bass cancellation wipes out the result.
This setup works best with true IB or free-air drivers. In small-signal loudspeaker theory, higher-Qts drivers are often better candidates for free-air style use than low-Qts drivers, but the safer real-world rule is still to use a driver explicitly rated by its manufacturer for infinite-baffle or free-air installation. Peak output is generally lower than a strong tuned ported box, but cabin space stays more open.
Match design to use case
For a daily driver with limited cargo loss, sealed usually makes the cleanest fit. For a sound-quality build, sealed often stays easier to package and easier to get right. For an SPL-focused build, ported or bandpass may make sense if the car can spare the space and the design work is accurate.
Car cabins also shape the result. Low-frequency cabin reinforcement is real, but the frequency where it becomes noticeable depends on cabin dimensions and leakage, so any single number should be treated as a rough example rather than a rule. That is one reason a modest sealed system can sound fuller inside the car than raw free-field assumptions suggest.
What happens when the box is too small or badly tuned?
When a box is too small, the subwoofer often loses low-end extension and efficiency, and the response can turn peaky because system Q rises. When a ported box is badly tuned or under-ported, output near the intended bass range can weaken, port noise can rise, and the sub may unload below tuning.
Too-small sealed boxes
In a sealed enclosure that is smaller than the driver expects, the trapped air acts like a stiffer spring. That raises system Q, reduces deep extension, and can shift energy upward so the bass sounds less full than the sub’s size suggests.
Picture a standard-depth 12-inch sub forced into a behind-seat box that nets only 0.70 cu ft when the driver calls for much more. It may still make bass, but low notes fade earlier and the output can feel disappointing for the cone area used.
Ported design errors
Ported boxes fail in several ways. If the net volume is too small, the tuning target may be missed. If the port area is too small, air velocity rises and port noise follows. If the port is too short or too long for the target, the useful output band shifts away from the goal.
Below tuning, cone control drops compared with a sealed box. That is why wrong tuning can make a capable driver sound weak on the notes you care about, then behave poorly when played lower than the enclosure was designed to support.
Why verification matters before install
Many bad results come from stacked small errors. A half-inch lost to a double baffle, a forgotten brace, and a port bend that steals depth can turn a paper-correct plan into the wrong net volume.
What box size should you use for a 12-inch sub?
Use the 12-inch sub’s own enclosure specification first, because cone diameter alone does not set the right box volume. As broad context from current mainstream 12-inch car-sub spec sheets, compact shallow models can land around 0.80 cu ft sealed net while many standard-depth 12s land closer to about 1.0 cu ft or more sealed net, but the exact driver requirement, mounting depth, and your vehicle’s space still decide whether sealed, ported, shallow-mount, or a different driver size makes sense.
Why 12-inch does not answer the whole question
Some 12-inch drivers are built for compact sealed boxes. Others expect large ported alignments that may be hard to fit once port volume and length are included. Basket depth can also rule out standard 12s in trucks and under rear seats.
When a shallow-mount 12 makes more sense
If the target area is under a seat or behind a truck bench, a shallow-mount 12 in a sealed low-profile box may beat a standard-depth 12 that technically fits diameter-wise but misses depth, grille clearance, or seat travel.
Say your crew cab has 7 inches of real depth behind the folded seat support after carpet and trim are considered. A standard 12 may force a box that steals seat position, while a shallow-mount 12 can reach the needed sealed net volume without that conflict. If that is your use case, start with shallow-mount subwoofers instead of trying to force a conventional basket into the space.
What material and construction details matter?
The enclosure material and build quality matter because panel flex, air leaks, and poor bracing change the box you thought you designed. MDF is the common standard, 3/4-inch panels are a common minimum for many builds, and thicker baffles or double baffles make sense when the driver is heavy or the front panel span is large.
MDF thickness and baffle choices
3/4-inch (19 mm) MDF is a common baseline in car-audio enclosure plans from major brands and established box builders because it balances stiffness, cost, and predictable machining. It is not a law for every enclosure, but it is the dimension most often assumed when a published box drawing does not call for something thicker. For larger drivers or wide unsupported panels, add bracing or a thicker front baffle and recalculate the lost air space. Our MDF thickness and baffle bracing guide covers when that extra front panel is worth the volume penalty.
Large woofers, high-power builds, and wide unsupported panels often benefit from extra bracing or a double front baffle. Just remember that every extra layer reduces internal volume and must be included in the math.
Bracing, sealing, and hardware
Bracing stiffens panels and reduces lost energy to wall movement. It also consumes internal air space. Seal all joints well, especially in sealed boxes where leaks change the alignment and in ported boxes where leaks can blur tuning behavior.
Fastener choice matters less than fit and sealing. A poorly cut joint with many screws is still a poorly cut joint.
Terminal, wiring, and service access
Place the terminal where cable routing stays clear of seat frames, hinge arms, and sharp metal. Leave room for wire bend radius, amplifier access, and future sub removal. A box that forces complete interior disassembly just to replace a woofer is a planning miss.
How do you verify box fit before installation?
Verify fit by checking both the internal math and the real exterior package. Mock up the box size, confirm the subwoofer’s mounting depth and grille clearance, and make sure the enclosure can pass through the opening, clear hinges, let the hatch close, preserve any needed seat movement, and still leave access to mounting points and equipment.
Mock up before buying or cutting
Use cardboard, foam board, or taped panels to represent the finished exterior dimensions. This catches opening and hinge problems before money is tied up in MDF or a prefabricated box that never fits.
Confirm hardware clearances
Check mounting depth from the inside of the baffle to the nearest rear obstruction. Add room for a grille if the cone faces cargo. Ported boxes also need clearance at the port exit so nearby panels do not choke airflow.
Side-fire and rear-fire layouts can help or hurt depending on the vehicle. The right choice is the one that fits the car without starving the driver or port of breathing room.
Final vehicle checks
- Trunk or hatch closes without hitting the enclosure
- Rear seats still fold if that function must remain
- Tie-down points or mounting anchors remain usable
- Amp rack, fuse access, and spare-tire access still work as planned
- The enclosure can be secured against movement
Author notes and measured fitment examples
This article was edited with hands-on fitment notes from measured sedan, SUV, and crew-cab truck layouts, then checked against manufacturer enclosure sheets from JL Audio, Alpine, and KICKER. The focus here is not generic “12-inch box” advice but the real packaging limits that decide whether a design works once seat travel, trunk openings, panel thickness, vent displacement, and service access are counted.
Two representative planning cases shaped the worksheet above. In one compact-sedan trunk, a paper plan for a standard rectangular vented box looked acceptable at floor level, but the usable pass-through opening reduced the true install size to roughly 33 inches wide by 15 inches high; shifting to a lower-profile sealed layout preserved install clearance and avoided a box that would not physically enter the trunk. In a crew-cab truck example, a behind-seat space with about 7.5 inches bottom depth and roughly 4 inches top depth produced less than 2.0 cu ft gross once wedge math was done; that moved the recommendation from a conventional deeper 12 to a shallow sealed design that maintained rear-seat travel.
Those examples are included as fitment case studies, not as claims that one box type is best for every vehicle. The point is that actual dimensions, opening constraints, and manufacturer net-volume targets decide the winner. If your layout is close, use the worksheet first, then compare the exact model on your shortlist against related guides on sealed vs ported subwoofer boxes, subwoofer sizes, and MDF thickness and baffle bracing.
Frequently asked questions
How do I choose between a sealed and ported box?
Choose sealed when space is tight, the driver supports it, and a smoother, more forgiving alignment fits the goal. Choose ported when the vehicle can spare more net volume and port length, and the aim is stronger output around a tuning frequency that is commonly set around 30–36 Hz in car audio.
Does subwoofer box size matter for sound quality?
Yes. Box size changes system response, low-frequency extension, efficiency, and how controlled the driver behaves. Too little net volume can raise system Q and reduce deep bass, while the wrong ported volume or tuning can shift output away from the target range and add noise or weak low bass.
What is the best subwoofer box design for deep bass?
There is no single best design for every car. Deep bass often points toward a properly sized and correctly tuned ported enclosure, but that only works if the available space can support the larger net volume and adequate port dimensions. In tight spaces, sealed may deliver the better real-world result.
How can I fit a subwoofer box in my trunk?
Measure the trunk opening first, then the usable floor area, height, hinge path, and cargo limit. Convert that space into maximum exterior box dimensions, subtract wall thickness and displacement losses, and compare the resulting net internal volume to the sub’s requirements. Wedge shapes and shallow-mount drivers often solve fitment problems.
What material is best for a subwoofer box?
MDF is the common standard because it is dense, consistent, and easy to seal. A common minimum is 3/4-inch (19mm) MDF, with thicker front baffles or double baffles used when the driver is heavy or power is high. Stiff panels and airtight joints matter as much as the sheet material.
Do I need a box for a car subwoofer?
Usually, yes. Most car subwoofers are designed for a sealed or ported enclosure with a specified net internal volume. The main exception is an infinite baffle or free-air setup, which still needs proper front-to-rear wave separation and a driver rated for that kind of installation.
Sources
- JL Audio product application sheets and owner’s manuals for TW3 and W3 series subwoofers, including published sealed and ported enclosure recommendations, mounting depth, and displacement data.
- Alpine owner’s manuals and specification sheets for S-Series subwoofers, including S-W10D4 and S-W12D4 enclosure recommendations and mounting data.
- KICKER CompR subwoofer manuals and enclosure recommendations, including published sealed and vented box targets for 10-inch and 12-inch models.
- Vance Dickason, Loudspeaker Design Cookbook, for enclosure alignment principles, vented-versus-sealed tradeoffs, and the limits of using Qts by itself.
- Richard H. Small and A. Neville Thiele loudspeaker alignment papers, for the underlying vented-box and closed-box design relationships used by modern subwoofer recommendations.
- F. Alton Everest and Ken C. Pohlmann, Master Handbook of Acoustics, for general low-frequency behavior, resonance, and why cabin dimensions affect perceived bass.