Rear Dash Cam: How to Choose, Install and Use One
Choose a rear dash cam by matching the camera type to your vehicle’s rear glass, then choosing a 130–160° lens and either simple ignition power or a hardwire kit with battery cutoff if you need parking mode. The right fit prevents blocked visibility, weak night footage, dead batteries, and rear cameras that record mostly your own trim.
A rear dash cam can be a stand-alone rear-facing camera or the rear unit in a front-and-rear kit. The part that matters most is fitment: rear glass angle, tint, wiper coverage, cargo blockage, hinge movement, and whether the camera must record while parked all change what will work.
| Comparison | Option A | Option B | Best fit |
|---|---|---|---|
| Connection | Wired rear dash cam | Wireless rear dash cam | Wired is usually better for stable continuous recording; wireless can simplify one cable run but still needs rear power. |
| Camera type | Stand-alone rear cam | Rear unit in a front-and-rear kit | Stand-alone works when you only need rear coverage; a two-channel kit is cleaner if you want one memory card, one app, and one parking-mode system. |
| Recording behavior | Parking mode | Loop recording | Parking mode watches the car while parked; loop recording is the normal overwrite process while driving and does not replace parking surveillance. |
What should a rear dash cam do in your vehicle?
A rear dash cam should capture readable rear-facing video in daylight and at night, save impact events, and, if needed, monitor the vehicle when parked without draining the battery. The right setup depends on whether the camera is stand-alone or part of a front-and-rear kit, and on whether your rear glass gives it a clean, usable view.
Single rear camera vs rear unit in a front-and-rear kit
A stand-alone rear dash cam is simpler when the only goal is rear coverage and the car already has a front camera. A rear unit from a two-channel kit usually records through the main front unit, which means one memory card, one app, and one parking-mode setup.
Most two-channel rear cameras are small and designed to mount on the inside rear glass. They depend on a long video cable to the front unit. That cable run is simple in many sedans and much harder in a hatchback, truck, or van with moving liftgates, sliding doors, or long cabin runs.
Rear dash cam vs backup camera vs mirror display
A rear dash cam records continuously, saves event clips, overwrites old footage in loops, and may keep recording in parking mode. A backup camera does a different job. It usually turns on only in reverse, uses very wide framing for close objects, and may have guide lines and delay that are fine for parking but poor for evidence.
Mirror displays sit between the two. Some record, some mainly display. If the goal is evidence after a rear-end hit, a lane-change dispute, or a parking bump, continuous recording and event saving matter more than reverse guidelines.
The evidence jobs that matter most
Rear coverage helps most in rear-end crashes, hit-and-runs in parking lots, tailgating, and disputed lane-change events where the front camera sees little or nothing behind the car. It can also show whether brake lights, following distance, and impact timing match the claim being made.
Say your sedan gets bumped overnight on a city street. A rear camera with buffered parking mode can save the seconds before and after impact. A reverse-only camera generally cannot record while parked, because it is not designed to do so.
How do you choose the right rear dash cam?
Choose the rear dash cam that physically fits your vehicle first, then pick image settings and power method. Sedan rear glass, hatchback liftgate glass, SUV spoiler shadow, truck cab distance, and van cargo blockage all decide whether an inside-glass rear camera will produce a clear rear-road view or mostly record trim, tint, and glare.
Start with your vehicle layout and rear glass shape
Sedans are usually the easiest. The rear glass is fixed, there is often a clear high-center mount area, and the cable can pass under the headliner to the front camera or fuse box without crossing moving hinges.
Hatchbacks and SUVs need more care. The rear glass is often more vertical, which can help distance judgment, but the liftgate moves, the rear wiper may cover only part of the glass, and a roof spoiler can cast a dark band across the top edge. Place the lens in the wiped area when possible.
Trucks and vans split into different cases. A crew-cab pickup may allow a cabin rear-glass mount, but that view stops at the bed. A van with a bulkhead or stacked cargo may block the entire rear view, which makes an inside-glass rear dash cam the wrong choice for full rear-road footage.
Choose features by use case
For daily commuting, a basic two-channel kit with 1080p rear recording, loop recording, HDR or WDR, and adjustable G-sensor sensitivity is enough in many cars. Street parking raises the bar. Look for hardwire support, buffered parking mode, and low-voltage cutoff protection.
Long highway driving benefits more from stable bitrate, reliable file saving, and controlled headlight glare than from headline resolution. Tailgating incidents often happen at speed and at night, where sensor size, exposure control, and tint matter more than a 4K badge.
Match budget to install difficulty and image goals
If you are comparing total install cost, rear camera pricing alone does not tell the full story. Cable length, hatch routing, hardwiring, parking protection, and card quality can matter more than the cheapest body style match. For setup planning, it also helps to compare rear dash cam placement for the best view and parking mode dash cam options before you buy.
Most buyers should start with 1080p rear, a lens around 140–150°, HDR or WDR, app access for angle checking, and a hardwire kit only if parking mode is genuinely needed. Rear 4K often adds cost without fixing small-sensor night limits.
Which specs matter for useful rear footage?
Useful rear footage comes from balanced specs rather than the highest resolution alone. A 1080p rear camera is the baseline, 2K can help if bitrate stays adequate, and lens angle, sensor size, aperture, HDR or WDR, and headlight control usually matter more than a rear 4K claim.
Resolution, frame rate, and bitrate
1080p is commonly treated as the practical floor for a rear dash cam. Lower than that often throws away detail that matters in lane changes or parking bumps. 2K can improve daytime detail if the camera is not heavily compressing the file. If bitrate is low, extra pixels do not buy much, because bitrate governs how much data is available to represent the image (AWS: What is bitrate?).
Frame rate is a tradeoff. Thirty frames per second is normal and usually fine. Sixty frames per second can help with motion clarity, but some cameras reduce exposure time or bitrate to get there, which can hurt low-light footage. Most manufacturers list rear cameras at lower bitrate than front cameras in two-channel kits, so expectations should stay realistic.
Field of view, sensor size, and aperture
A lens in the 130–160° range is the useful zone for most rear cameras. Below that, adjacent-lane coverage can feel tight. Above that, wide-angle distortion can shrink distant vehicles and make plate reading harder.
Sensor size matters because rear glass is often tinted and headlights hit from behind. A larger sensor and a reasonably bright aperture can help keep shadow detail without pushing noise too hard, consistent with basic low-light imaging behavior in small sensors (Cambridge in Colour: sensor size). That does not mean every night plate becomes readable. Rear license plates at night are often limited by glare, closing speed, tint, and compression.
HDR, WDR, glare, and night limits
HDR or WDR can help when bright headlights and dark surroundings share the frame. It can also help under parking-lot lighting or in dawn and dusk transitions. It cannot fully overcome dark privacy glass or a dirty rear window.
Suppose your hatchback has factory privacy glass and the camera sits outside the rear wiper sweep. Even with HDR on, the night clip may show smeared light and poor plate detail because the lens is looking through dark glass with a film of road spray. In that case, mounting position changes more than a higher resolution setting.
Where should you mount a rear dash cam?
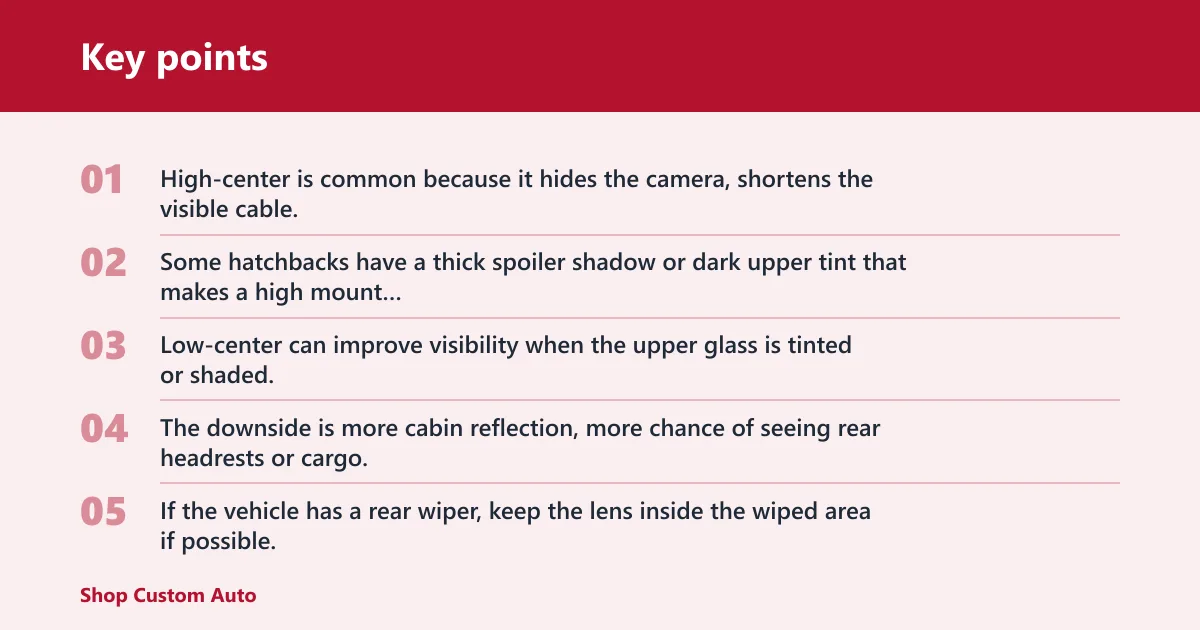
The best mount point is the inside rear glass where the lens sees the lane behind, avoids trim and spoiler shadow, and sits in the rear wiper’s swept area when possible. High-center works often, but low-center can be better if tint, glass angle, or a spoiler blocks the upper section.
High-center vs low-center on inside rear glass
High-center is common because it hides the camera, shortens the visible cable, and usually keeps the lens out of cargo sight lines. But it is not automatic. Some hatchbacks have a thick spoiler shadow or dark upper tint that makes a high mount too dim.
Low-center can improve visibility when the upper glass is tinted or shaded. The downside is more cabin reflection, more chance of seeing rear headrests or cargo, and a greater chance the camera records your own trim if it sits too close to the bottom edge.
Wiper sweep, defroster lines, tint, and spoiler shadow
If the vehicle has a rear wiper, keep the lens inside the wiped area if possible. That single choice often helps more than chasing higher resolution. Water film and road grit on unwiped glass can ruin night footage.
Defroster lines usually do not block the image badly, but they can interfere with adhesive contact if the pad bridges raised lines unevenly. Clean the glass with an alcohol wipe, let it dry, and make sure the adhesive pad sits flat. Heated rear glass can also create reflections under some lighting, so recheck the angle at night.
Dark tint is different from mild tint. HDR and WDR help exposure balance, but dark rear glass still cuts light. If the camera is behind privacy glass and the vehicle parks outside at night, expect weaker plate capture than the same camera would get through clear glass.
Sedan, hatchback, SUV, truck, and van differences
On a sedan, mount near the top center of the rear glass unless the tint band or rear deck reflections force a lower position. Aim slightly downward so the horizon sits around the upper third of the frame, not the center.
On a hatchback or SUV, check the wiper arc and spoiler first. A mount just below the top shadow line often works better than the highest possible point. Keep clear of trim that moves with the liftgate and leave space for the cable to bend gently near the hinge.
On a truck, decide what view you want. A cabin rear-glass camera sees traffic behind the cab, not what happens directly behind the tailgate or inside the bed. On a van, cargo and bulkheads can make an inside rear-glass camera useless for road footage if the rear doors or load area block the view.
How should you power it for driving and parking mode?
Power the rear dash cam through the main front unit or its own lead using either a 12V accessory socket, supported USB power, or a hardwire kit. Choose hardwiring only when parking mode is worth the added install complexity and the kit includes low-voltage cutoff protection.
12V socket vs USB power vs hardwire kit
A 12V accessory socket is the easy option. It usually powers the camera only with ignition or accessory power, so there is little battery-drain risk, but parking mode may not work. USB power can be tidy if the camera supports the correct voltage and current. Many do not handle all USB ports equally well, so check the manufacturer’s requirement.
A hardwire kit taps vehicle power through the fuse box. It is the normal route for parking mode because it can monitor constant power and switched ACC power separately.
Fuse taps, constant power, ACC power, and voltage cutoff
For parking mode, the hardwire kit usually needs one constant-power fuse, one ACC or ignition-switched fuse, and a ground. Add-a-fuse sizing must match the vehicle’s fuse type. Common formats include low-profile mini, mini, and micro2, but the correct type depends on the fuse box.
Voltage cutoff matters because parking mode can flatten a battery if left unchecked. Many hardwire kits allow cutoff around 11.8V, 12.0V, 12.2V, or 12.4V, which matches the selectable ranges used by common dash-cam hardwire modules (VIOFO HK4 guidance; BlackVue Power Magic Pro). Higher cutoff protects the battery better but shortens recording time. Daily-driven vehicles can tolerate more parking-mode use than a car left parked for a week.
Buffered, motion, impact, and time-lapse parking modes
Buffered parking mode records a few seconds before and after an event, which is best for impact evidence. Motion detection can fill the card with passing pedestrians or traffic if the car faces a busy street. Impact-only mode is lighter on power but misses near-misses and approach footage.
Time-lapse reduces storage use and power draw, but it records fewer frames and is weaker for fast action. For daily drivers, buffered event mode or impact mode is often the best balance. For long airport parking, aggressive parking mode can become a battery problem unless cutoff is set conservatively.
How do you install it cleanly without trim problems?
Install a rear dash cam cleanly by planning the full cable path before sticking the camera to the glass. Use trim tools, route wires at panel edges, avoid side-curtain airbag paths and moving hinge pinch points, and leave slack only where the hatch or door actually needs movement.
Tools, adhesive prep, and cable-routing basics
Useful tools are simple: a plastic trim tool, alcohol wipe, spare adhesive pads, cable clips, and, for hardwire installs, a fuse tap kit and the right add-a-fuse size. Cold glass and textured frit dots can weaken adhesive. If the camera lands partly on textured glass, move it or use the maker’s approved mount pad if one is supplied.
Dry-fit the camera first. Check the live view before removing the adhesive backing. Once the angle is right, clean the mount area, press the pad firmly, and let the adhesive set according to the pad instructions.
Safe routes around headliner, pillars, weather seals, and hatch looms
In most sedans, the rear cable can follow the headliner edge toward an A-pillar, then down to the front unit or fuse box. Tuck at trim edges rather than forcing the cable deep behind pillar trim. Side-curtain airbag areas must stay clear so the airbag can deploy without dragging the cable with it.
On hatchbacks and SUVs, route through the headliner to the liftgate area, then through the factory rubber loom if there is room and the cable diameter allows it. Avoid sharp bends where the loom meets metal. Leave a gentle service loop so the hatch can open fully without straining the connector.
Long runs in trucks and vans
Long cabin runs need patience. A pickup with a rear-camera lead going from windshield to rear glass may need cable routing past multiple trim sections. A van can require even more length, especially with high roofs or rear doors.
Picture a cargo van with a steel bulkhead behind the front seats. A standard inside rear-glass camera mounted on the back doors may record little more than the cargo area unless the bulkhead has a window and the load stays below it. In that layout, a typical inside-glass rear dash cam may not fit the job at all.
How do you set it up so the footage is actually usable?
Set up the rear dash cam by confirming the live view framing, date and time, firmware version, loop length, G-sensor sensitivity, parking sensitivity, and memory card status. Many bad installs are actually settings failures: wrong timestamp, low bitrate mode, oversensitive event triggers, or a failing microSD card.
Live-view alignment, date and time sync, and firmware updates
Use the app or screen to align the rear camera after the adhesive is in place but before the cable is fully hidden. Make sure the lane behind is centered and that the horizon is level. If the system supports Wi-Fi pairing, connect once and confirm the rear stream is recording at the expected quality setting.
Sync date and time immediately. If the app can pull time from the phone, use it. If not, set it manually and recheck after a firmware update or battery disconnect. Wrong time stamps reduce the value of footage in a dispute.
Loop recording, G-sensor, and parking sensitivity
Loop recording is normal. The camera records over the oldest unlocked files when the card fills. Three-minute clips are a common middle ground: short enough for easier event review, long enough to reduce file clutter.
Set G-sensor sensitivity low to medium first. Too high and potholes lock half the card. Too low and actual impacts may not trigger protected files. Parking sensitivity should match the environment. A car parked on a busy downtown street needs calmer settings than one parked in a quiet driveway.
microSD endurance, capacity, formatting, and card health
Use a high-endurance microSD card, not a generic card meant for occasional phone storage. Dash cams write constantly, and card failure is one of the most common reasons for missing clips. Manufacturers and storage brands commonly recommend endurance-rated cards for continuous-write uses such as dash cams and security cameras (SanDisk High Endurance; Kingston High-Endurance microSD). Check the camera’s supported capacities; many accept 64GB, 128GB, or 256GB, while some stop lower.
Format the card in the camera on a regular schedule. A common rule of thumb is monthly formatting for daily-driven vehicles, or sooner if the camera throws card errors. Keep loop overwrite on unless there is a special reason to preserve all clips manually.
Rear dash cam checklist
| Vehicle type | Recommended mount zone | Power method | Cable route | Parking-mode risk | microSD recommendation | 5-step post-install test |
|---|---|---|---|---|---|---|
| Sedan | Inside rear glass, high-center unless upper tint band or rear-deck reflection forces a lower spot; keep clear of defroster-line gaps and third brake light housing | 12V accessory socket for driving only; hardwire kit with ACC plus constant power and 12.0V or higher cutoff if parking mode is needed | Rear glass to headliner edge, across roofline, down A-pillar edge to front camera or fuse box; avoid side-curtain airbag path | Lower battery risk than always-on motion mode, but impact or buffered parking can still drain a rarely driven car | High-endurance microSD, 128GB as a strong starting point if supported; 64GB minimum for daily use | 1) Check framing from lane to lane. 2) Record a daytime clip and confirm plate detail at stoplight distance. 3) Record a night clip and check glare. 4) Trigger an event save with a firm door close, not a violent hit. 5) Confirm timestamp and playback on phone or PC. |
| SUV/hatchback | Inside liftgate glass within rear wiper sweep, usually just below spoiler shadow and centered between hinge areas | Hardwire kit is often worth it if the vehicle street parks; 12V socket is fine if parking mode is unnecessary | Headliner edge to liftgate, through factory hatch loom where possible, then to camera with a small service loop at moving hinge points | Medium battery risk because motion detection can trigger often in open lots; hatch movement can also stress cable if slack is wrong | High-endurance microSD, 128GB or 256GB if the front-and-rear system supports it and parking clips are frequent | 1) Open and close hatch five times and watch cable slack. 2) Verify lens sits in wiped area. 3) Check daytime clip for spoiler shadow. 4) Check night clip through tinted glass for glare and reflections. 5) Test parking trigger and confirm saved clip length. |
| Truck/van | Truck: inside cab rear glass, high-center if the view past the bed is acceptable. Van: only use rear-glass mount if bulkhead and cargo do not block the rear-road view. | Hardwire kit preferred for long-run installs and parking mode; accessory socket works if the route to the front power source is cleaner and parking mode is not needed | Long roofline or pillar route to rear glass; protect cable at door frames, hinges, and bulkhead pass-through points; avoid pinch points at sliding or rear doors | Higher battery and reliability risk because long cable runs add failure points and parked commercial vehicles may sit for days | High-endurance microSD, 128GB minimum if supported; consider 256GB for heavy daily driving or time-lapse parking use | 1) Confirm the camera sees the road, not mostly cargo or bed rails. 2) Check full-length cable security along the route. 3) Play back a daytime highway clip for vibration or dropouts. 4) Test ignition-off parking entry. 5) Recheck voltage cutoff behavior after an overnight park. |
Text-only buyer/install
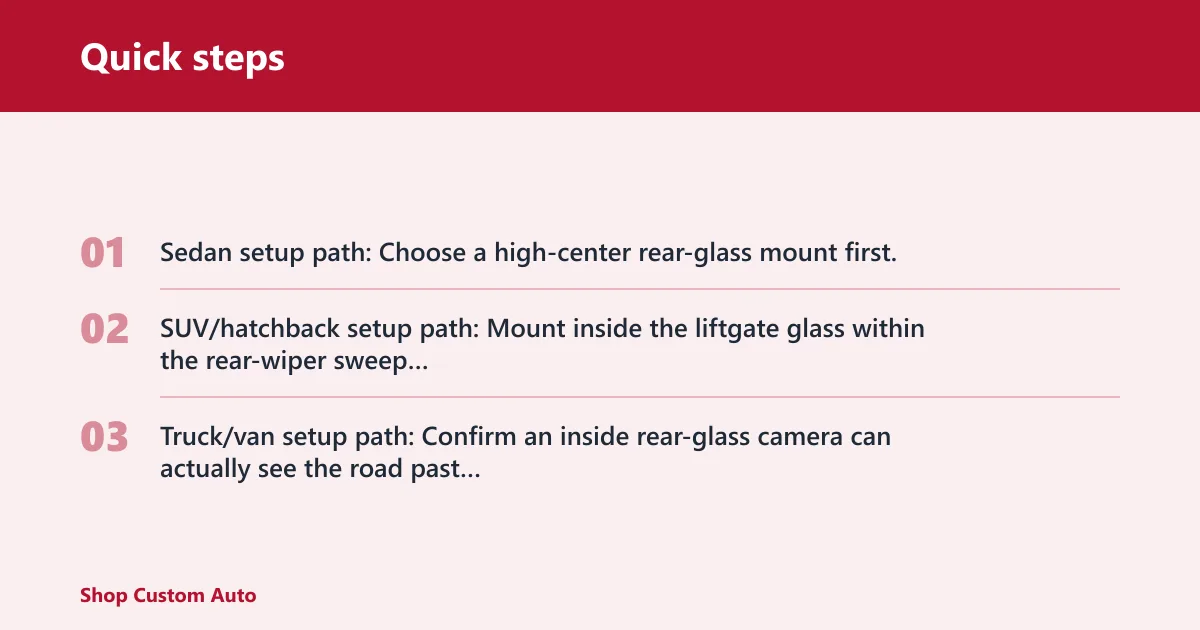
Sedan setup path: Choose a high-center rear-glass mount first, drop lower only if the upper tint band or rear-deck reflection hurts the view, use a 12V socket for drive-only recording or hardwire for parking mode, route along the headliner and A-pillar edge, then verify framing, timestamp, glare, and card health.
SUV/hatchback setup path: Mount inside the liftgate glass within the rear-wiper sweep and below spoiler shadow, use a hardwire kit if the vehicle street parks, route through the hatch loom with a small service loop, then test hatch movement, parking triggers, night glare through tint, and saved clip length.
Truck/van setup path: Confirm an inside rear-glass camera can actually see the road past the bed, cargo, or bulkhead before buying, favor hardwiring for long runs and parking mode, protect the cable at hinges and door frames, then test vibration, ignition-off parking entry, and overnight voltage-cutoff behavior.
What mistakes cause bad rear footage or false alarms?
Bad rear footage usually comes from fitment mistakes, not missing premium features. Mounting outside the wiper sweep, aiming too high, hiding the lens behind dark tint or dirty glass, using cheap memory cards, or setting G-sensor and parking sensitivity too high can leave you with weak clips or a card full of false events.
Poor placement, bad angle, and glass contamination
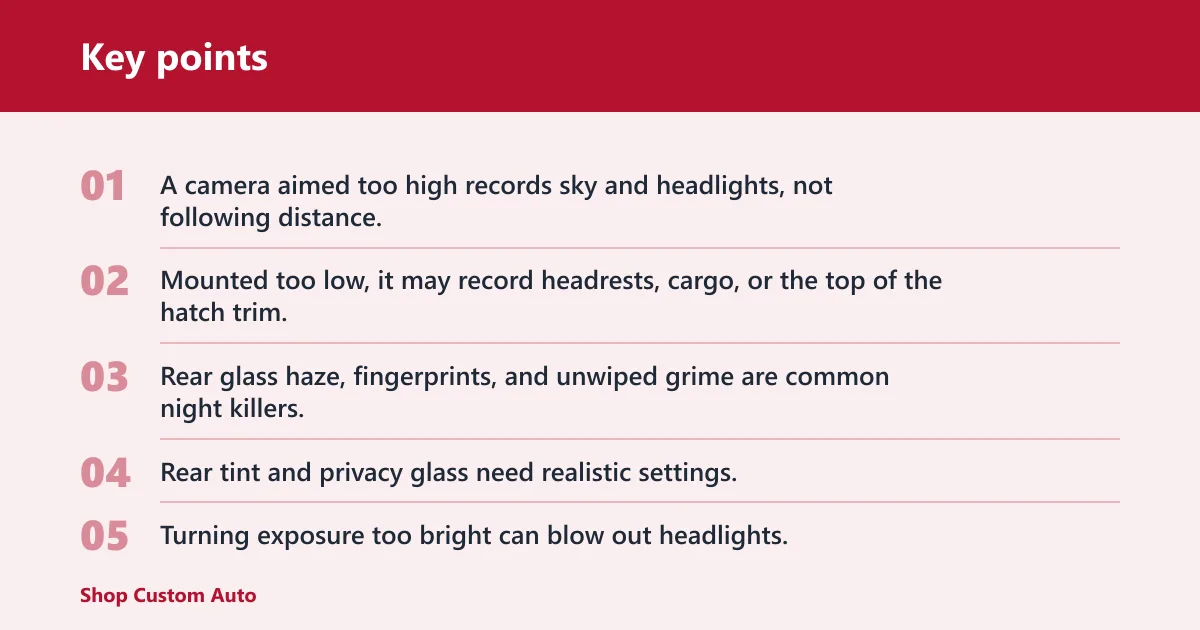
A camera aimed too high records sky and headlights, not following distance. Mounted too low, it may record headrests, cargo, or the top of the hatch trim. Rear glass haze, fingerprints, and unwiped grime are common night killers.
Wrong settings for tint, glare, parking mode, and G-sensor
Rear tint and privacy glass need realistic settings. Turning exposure too bright can blow out headlights. Parking motion sensitivity that works in a quiet garage may trigger constantly on a street-facing driveway. Start moderate, then adjust after reviewing real clips.
Power and storage failures
Many “camera problems” are card problems. Unsupported card size, low-endurance media, or skipped formatting can corrupt files. Hardwire problems show up as random shutdowns, missing parking clips, or a low battery after sitting. Check cutoff settings before blaming the camera.
Frequently asked questions
How do I choose the right rear dash cam for my car?
Start with vehicle fit, not the feature list. Check rear glass angle, tint, wiper sweep, spoiler shadow, cargo blockage, and cable length first.
What resolution do I need in a rear dash cam?
1080p is the practical baseline for rear footage. 2K can help in daylight if bitrate is strong, but 4K rear recording often adds cost more than usable detail. At night, tint, sensor size, glare control, and compression usually matter more than extra pixels.
Should I buy a wired or wireless rear dash cam?
Wired is usually the safer choice for continuous recording. Many “wireless” rear cameras still need power at the rear and may add pairing issues or heavier compression. Wireless can reduce one signal cable, but it does not remove the need to plan rear power and mount position.
Can a rear dash cam work through tinted rear windows?
Yes, but results depend on tint darkness and lighting. Mild tint is usually manageable with HDR or WDR. Dark privacy glass cuts light hard, especially at night, and plate capture may suffer. Mounting inside the rear wiper sweep and keeping the glass clean helps more than raising resolution.
How do I route the cable cleanly to the front camera or fuse box?
Run it along the headliner edge, down trim edges, and only through factory looms or weather-seal channels that do not pinch the cable. Keep clear of side-curtain airbag paths, leave a service loop at liftgate hinges, and avoid forcing thick connectors through tight trim gaps.
Can I use a rear dash cam as a reversing camera?
Usually no. A rear dash cam records for evidence, while a reversing camera is built for reverse-only viewing with close-range framing, guide lines, and acceptable parking latency. Some apps offer live view, but delay, angle, and legal integration are different from a proper backup camera.
Do I need parking mode on a rear dash cam?
Only if the car regularly sits where parked impacts, vandalism, or hit-and-runs are realistic risks. If you mostly want rear evidence while driving, normal loop recording is enough. If you street park often, buffered parking mode with a conservative voltage cutoff is the more useful upgrade.
What is the difference between parking mode and loop recording?
Loop recording is the camera’s normal overwrite cycle while driving, where old unlocked clips are replaced as the card fills. Parking mode is a separate low-power monitoring state for when the ignition is off. They work together, but one does not replace the other.
Is 60 fps better than 30 fps for a rear camera?
Sometimes, but not automatically. Sixty fps can improve motion clarity in daylight, yet some dash cams lower exposure time or spread limited bitrate too thin to maintain night quality. For many rear cameras, stable 30 fps with decent bitrate and exposure control produces more reliable evidence.
What lens angle should a rear dash cam have?
A rear lens around 130–160° is usually the useful range. Too narrow and nearby lanes can fall out of frame. Too wide and distortion shrinks distant cars and plates. Most buyers get the best balance near the middle of that range rather than at the extreme wide end.
How much microSD storage do I need?
For most rear or two-channel setups, 128GB is a strong starting point if the camera supports it. Use 64GB only when budget is tight or daily driving is light. Move to 256GB when parking clips are frequent, commute hours are long, or the system uses higher bitrates.
How often should I format a dash cam card?
Monthly is a practical schedule for many daily drivers, with earlier formatting if the camera reports errors or saved clips go missing. Formatting in the camera helps maintain the file structure the device expects. Endurance-rated cards still wear out, so occasional replacement is normal maintenance.
Can I install a rear dash cam myself?
Yes, in many sedans and some SUVs, especially if you are using a 12V plug instead of hardwiring. The job gets harder when you must pass through a hatch loom, work around side-curtain airbag areas, or run very long cables in trucks and vans. Planning the route is the key step.
Where should the camera sit on a sedan, SUV, or truck?
On sedans, high-center on the rear glass is usually best. On SUVs and hatchbacks, place it inside the wiper sweep and below spoiler shadow if needed. On trucks, a cabin rear-glass mount only works if the view past the bed gives you the rear-road coverage you actually need.
Sources
- AWS: What is bitrate?
- Cambridge in Colour: Digital Camera Sensor Size and Low Light Tradeoffs
- VIOFO HK4 hardwire kit guidance
- BlackVue Power Magic Pro low-voltage cutoff product information
- SanDisk High Endurance microSD information
- Kingston High-Endurance microSD card information